Configure automated enrollment Remote Desktop SSL certificates
Introduction
This blog describes the actions to take to configure auto-enrollment of Remote Desktop Connection computer certificates issued by your local CA server instead of using a self-signed Remote Desktop certificate. We will also investigate securing the connection to only allow SSL connections. Restricting RDP to only allow SSL mitigates the risk of data breaches for a more secure remote desktop experience and you don’t get a warning about the certificate anymore when you start a connection with RDP.
Resources
The following resources are used to configure and test the enrollment of RDP SSL certificates:
- Microsoft Windows server 2022 GUI for the Domain Controller DC01
- Microsoft Windows server 2022 GUI for the test server FS01
- Microsoft Windows 11 22H2 as test workstation WS01
- FS01 is a member server of the domain metisit.local
- WS01 is a member client of the domain metisit.local
- Installation of Active Directory Domain Services (AD DS) on DC01
- Installation of Active Directory Certificate Services (AD CS) on DC01
- Group Policy Management on DC01
Deploying a local Certification Authority (CA) server is useful for a lab environment, internal web servers, or dark sites. The installation of a CA server is already described in a previous blog: Create a certificate from the windows CA (hyperlink van maken: https://metisit.com/blog/create-a-certificate-from-the-windows-ca/)
Configure Certification Authority for enrollment
The first step on configuring the RDP certificate enrollment is to create a new certificate template. Creating this template will allow domain computers to enroll the certificate template.
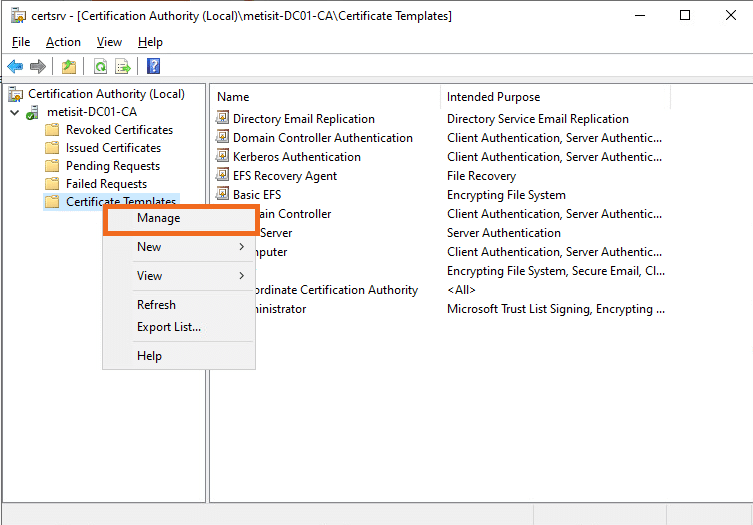
- Login to your CA server and open the Certificate Authority.
- Right click on Certificate Templates -> Manage
- Search for the Template Display Name Computer. Right click on it and select Duplicate Template
- Go to the General tab and change the Template name to: RemoteDesktop
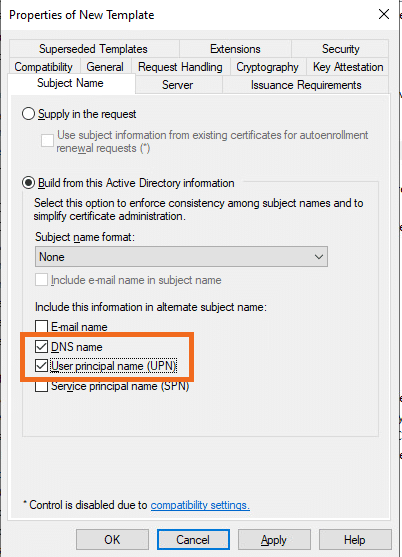
- Go to the Subject Name tab and check the marks for DNS name and User principal name (UPN) under Include this information in alternate subject name:
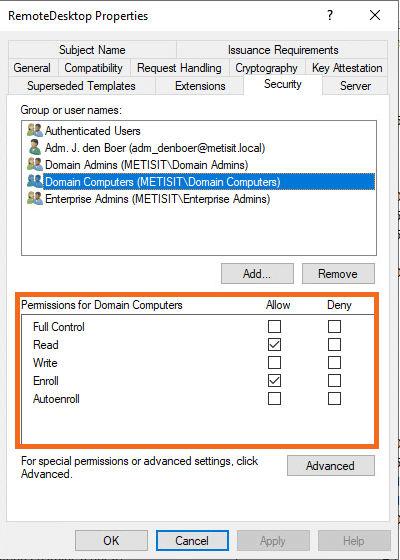
- Go to the Security tab and select Domain Computers. Check the marks for the following permissions under Permissions for Domain Computers: Read and Enroll
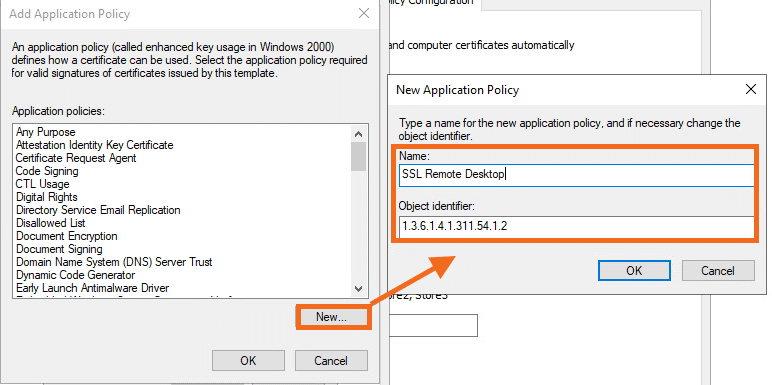
- Go to the Extensions tab and edit Application Policies. Click on Add…
- Click on New… and add the following variables:
- Name: SSL Secured Remote Desktop
- Object Identifier: 1.3.6.1.4.1.311.54.1.2
(1.3.6.1.4.1.311.54.1.2 is the object identifier for Remote Desktop)
- Press OK and search for the recently created SSL Remote Desktop policy. Select it and press OK
- Remove Client Authentication and Server Authentication. Press OK and Apply.
- Close the Certificate Authority Template window.
Publish created Remote Desktop template
The next step in configuring the RDP certificate enrollment is to deploy the recently created RemoteDesktop template.
It is possible that the template created is not available immediately. It can take up to 10 minutes before it is visible. You could restart the Active Directory Certificate Services if the templates are not visible within 10 minutes.
- Login to your CA server and open the Certificate Authority.
- Right click on Certificate Templates -> New -> Certificate Template to Issue
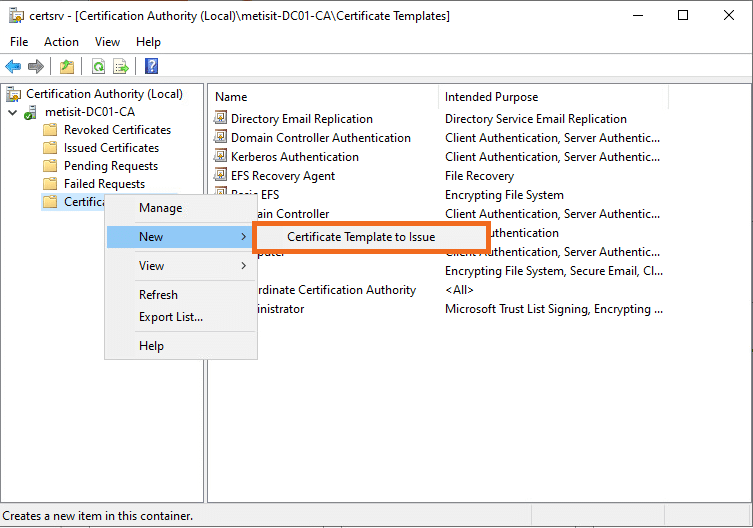
- Search for the recently created RemoteDesktop template, select it and press OK.
- The RemoteDesktop template is now published as you can see in the Certificate Templates folder.
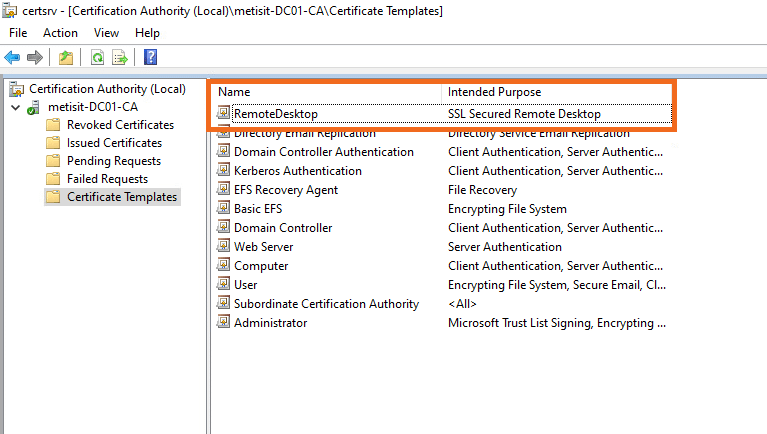
- Close the Certification Authority.
Configure secure RDP access with a GPO
The next step in configuring the auto-enrollment of RDP CA certificates is to configure secure RDP access. This will be done through a GPO.
- Login on your management server or Domain Controller. Open the Group Policy Management.
- Right click on your Domain and select Create a GPO in this domain, and Link it here…
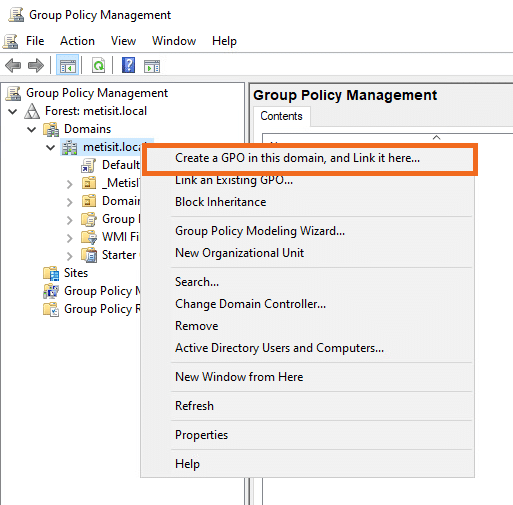
- Give the new policy a name, in this example we will name it: RDP Secure Access
- Right click the Certification Auto Enrollment policy and select Edit…
- Navigate to: Computer Configuration -> Policies -> Administrative Templates -> Windows Components -> Remote Desktop Services -> Remote Desktop Session Host -> Security
- Open Server authentication certificate template
- Enable this policy
- Enter the Certificate Template Name. This is the name that we have created in the previous topic: RemoteDesktop.

- Press Apply and OK. Open Require use of specific security layer for remote (RDP) connections
- Enable this policy
- Select SSL in Security Layer
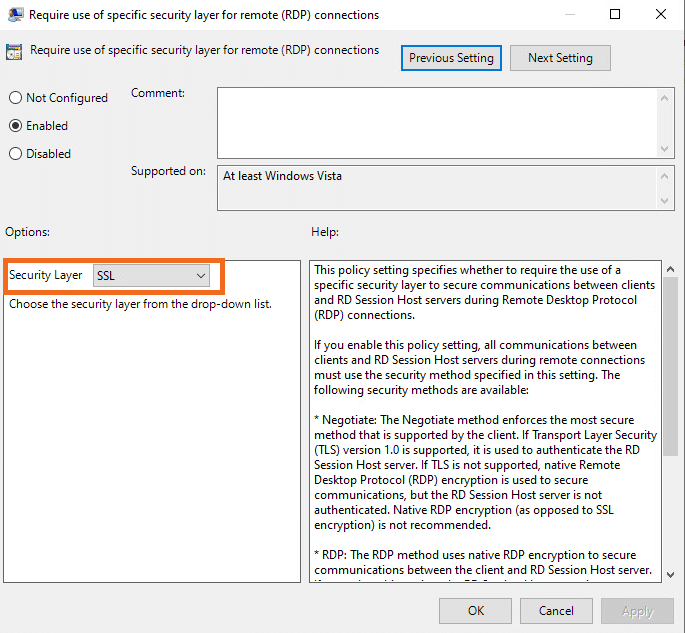
- Press OK. Close the group policy editor.
Testing the configuration
The final part of this blog is about testing the configured certificates to determine if the RemoteDesktop certificate template is applied to the clients where the GPO is applied.
- Login on a member server. The server used in this blog to test the published certificate is a fileserver named FS01.
You should perform a gpupdate /force or a server restart if the server was online during the configuration of the secure RDP certificates.
- Start powershell as an administrator.
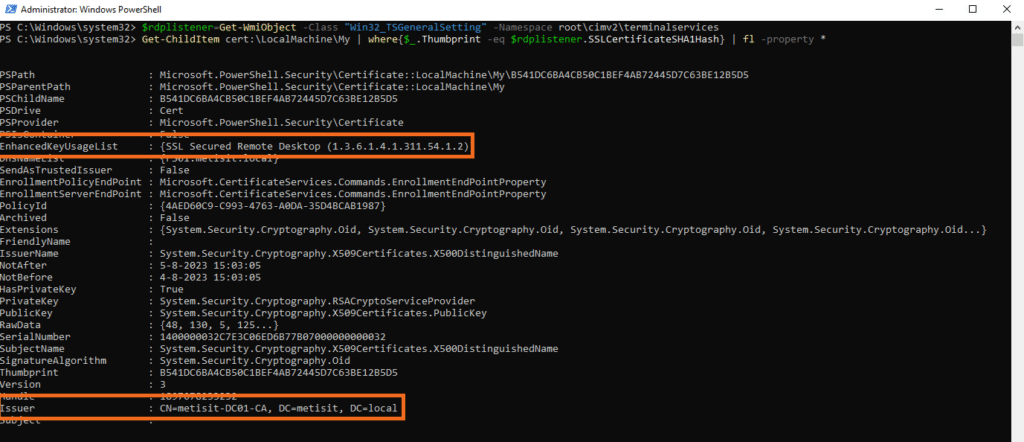
- Run the following command to get the RDP listener configuration into a variable named rdplistenerconfig:
$rdplistenerconfig=Get-WmiObject -Class "Win32_TSGeneralSetting" -Namespace root\cimv2\terminalservices
- Run the following command to check which certificate is used for the RDP listener:
Get-ChildItem cert:\LocalMachine\My | where{$_.Thumbprint -eq $rdplistenerconfig.SSLCertificateSHA1Hash} | fl -property *
- Check the the following values:
-
- EnhancedKeyUsageList to verify that the value is set to {SSL Secured Remote Desktop (1.3.6.1.4.1.311.54.1.2)}
- Issuer to verify that the issuer is our CA server: metisit-DC01-CA
Conclusion
Using a certificate from your local CA when using Remote Desktop ensures that your environment is always using CA certificates instead of self-signed certificates. The configuration in this blog also ensures that only a remote connection with SSL is allowed, which increases your IT security.
Deel dit bericht
Configure Nutanix resources with Ansible
Introduction Infrastructure as Code (IaC) is an IT infrastructure management approach that emphasizes the use of code to automate the provisioning, deployment, and configuration of infrastructure resources. The goal is to treat infrastructure as software,
Lees meerMicrosegmentation, A secure and agile wall around your most valuable assets
Microsegmentation, A secure and agile wall around your most valuable assets Introduction In today’s world where every little thing is connected to the web and everything is interconnected, securing computer networks is of very importance
Lees meer
Deploy Nutanix resources with Terraform
Deploy Nutanix resources with Terraform Introduction Infrastructure as Code (IaC) is an IT infrastructure management approach that emphasizes the use of code to automate the provisioning, deployment, and configuration of infrastructure resources. The goal is
Lees meer